These instructions assume that you have a basic understanding of what a
Level3 Trigger consists of. If you don't, please carefully read the
introduction page.
Here are the steps that will allow you to rename a trigger:
1. Know the old trigger name and version and what you'd like to rename the
trigger!
This seems obvious, but it's worth mentioning. Be aware of the naming
convention - here's a not-complete list (jonathan, is there a complete
list of the guidelines somewhere that we could paste here?):
- All capitals (the gui should rename with all caps if you don't type it
this way, but to avoid confusion, type it in with caps!)
- begin with L3_
- if it is a test trigger, include "test" in the name
- include values of important cut(s) (an 18 GeV central electron trigger
should have both "18" and "central" in its name)
Be aware of past conventions, old versions of triggers, and retired triggers
when you pick your name. If you aren't careful you may find that what you've
chosen will give you a version higher than 1 of a trigger, meaning that the
name you picked has been picked before. (Keep in mind the hundreds of
retired triggers that you don't see by looking with the Gui!)
Luckily the Gui is smart enough to
not make two version 1's of a trigger, but it's wise to avoid this situation
and the confusion that could result.
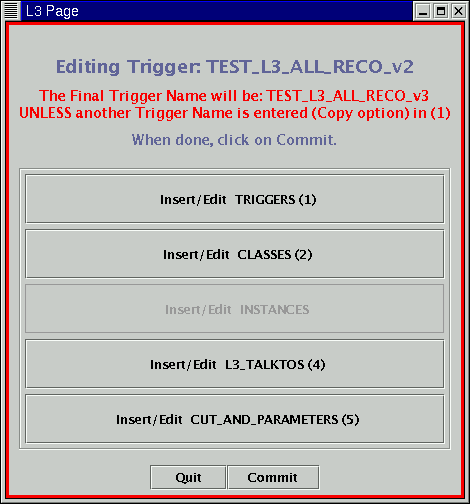
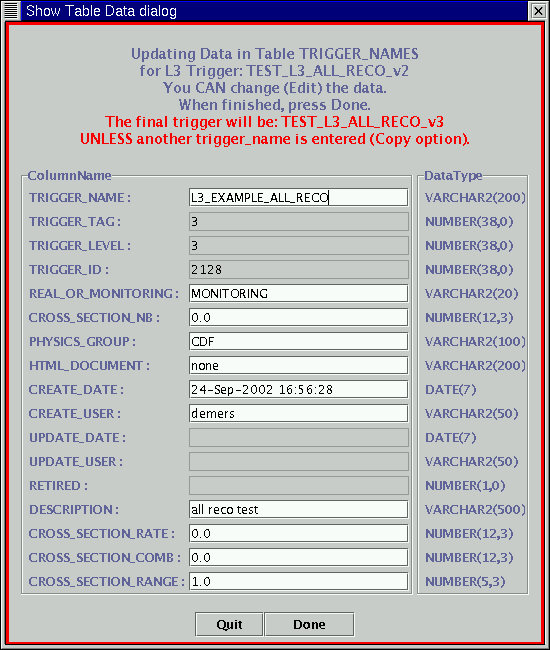
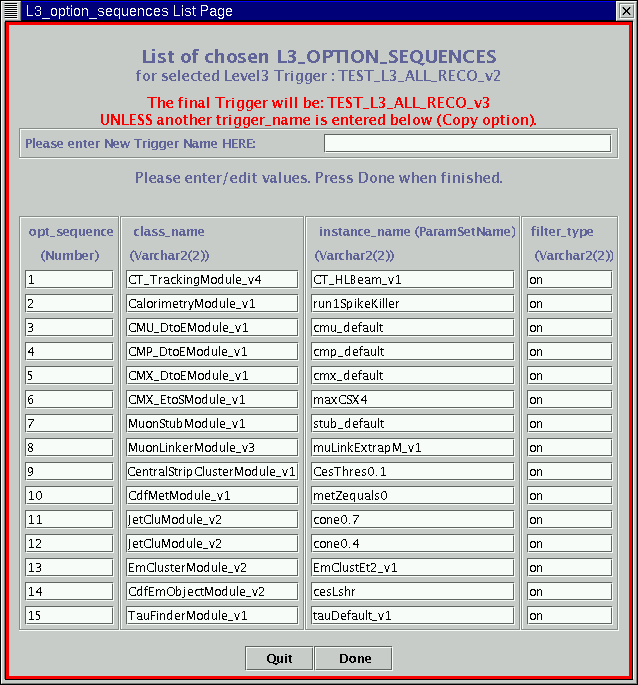
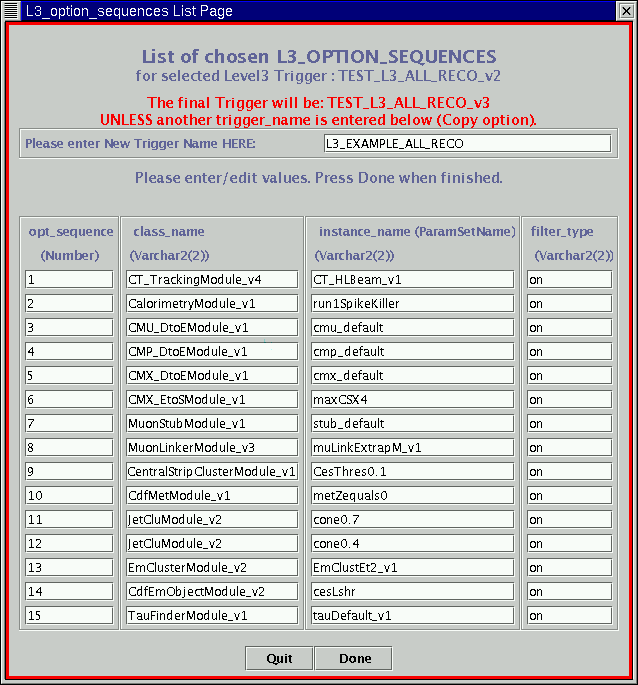
2. It's worth mentioning again that we're about to change nothing about
the trigger aside from its name. Let's say that we want to change the
name of "TEST_L3_aLL_RECO_v2" because it doesn't follow the convention
of beginning with a "L3" - so we'll change it to "L3_EXAMPLE_ALL_RECO".
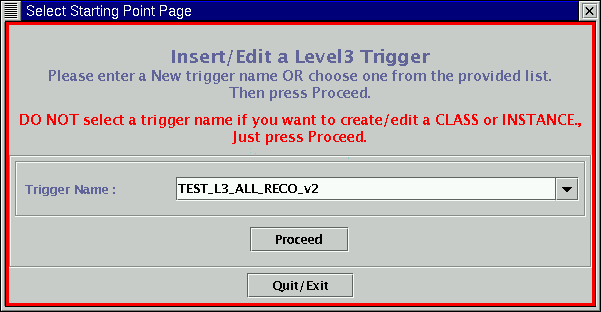
beginnnig from the main Gui page we need
to click on "Create/Edit L3 Triggers", to pop up the "Select Starting Point
Page". Here we need to select the name of the trigger that we want to
change from the pull down menu - here's what it looks like after
TEST_L3_ALL_RECO_v2 has been selected: